Thursday, November 30, 2006

Stampin' in a Winter Wonderland


We woke up this morning to RAIN! Great big globs of yucky rain. By mid-morning our "Lake Chenoweth" (the lake-sized puddle in the front yard) had frozen over and was starting to accumulate some white stuff... WHITE STUFF??!! SNOW??!! Nope. Frozen rain. Right now we've got enough of a dusting we can't see the grass under the white stuff; David insists that its snow.

Needless to say we're staying home today, as I hope my friends and family are as well. This afternoon (after nap time) Davy went out to play in the white stuff. I got a couple shots of him before Thomas pulled him to the ground to wrestle with! My poor frozen baby! After he played a big longer - in the front yard without Thomas - he came in for some hot cocoa. I love this picture of him enjoying his cocoa, with his goofy grin and cold red cheeks!

Anyway, while David was napping and playing outside today Mommy got some cards made- FINALLY! I have been contemplating the Card Sketch Challenges on SCS, and finally caved to participate. My first card was "OK" though by far not my favorite! (That would be the bonjour card!) So I redid the card using the same layout, but with different stamps colors and embellishments. I definitely like the second one (the cocoa card) MUCH better. What do you think?


Anyway, If you'd like to see the original sketch that I was working from click here to go to the Splitcoast Stapmer's Card Challenge thread. Go about half way through the first post in the thread and click on the little thumbnail pic. It will bring the sketch up in a new window. Have fun, and if you do this challenge then let me know so I can see it too!!

-Merr

Sunday, November 26, 2006

Christmas 10-10-10

Ahhhh.... It's finally over! Yesterday was a VERY LONG DAY! I went to bed the night before at like 3 am, and got up again the next morning at about 5:30. I'm the kinda girl who needs 8+ hours to feel human, and I wasn't getting it! Anyway, my first session started at 10, and was totally comprised of the girls that I usually scrap with. So I demo'ed the cards for them, then they went along their merry way doing what ever they wanted to. GRRRR... all that time for nothing. OK, what ever.

Then I went to my parent's house for Thanksgiving dinner. Because of some family situations we had to postpone it this year but they had to choose the only day that there was NO WAY I was going to be able to hang out and relax with them because I had a second session for my Christmas 10-10-10. Needless to say that I didn't get to eat at all because I had to leave mom's at 3 to make it home in time for the 4 o'clock session, which happened to be JUST when they were pulling the bird from the oven.

Over the next two hours of my second session I dreamed of the turkey, stuffing, gravy, three bean salad, hot rolls, candied yams, pumpkin bread, and PIE that my family was eating without me. *sigh* See what I give up for the love of stamping?

The second session went sooooo much smoother than the first. Partly because they managed to stop talking long enough to hear my instructions AND they went ahead and followed my instrctions! (Is this something that shouldn't be bothering me? Or do I have a right to be a teeny bit upset about this?)

Anyway I managed to survive my first stamp event (besides workshops that is). It was actually fun, and a little bit profitable for me. I got the word out there about upcoming events and so forth, so it was really a pretty productive day. Now I've got to go to Wal-Mart though and buy myself a turkey and stuffing stuff so I can have a Thanksgiving!!

Friday, November 24, 2006

Happy Thanksgiving!

Hope everyone had a fantastic Thanksgiving! I know mine was wonderful, though completely different that the 25 past years! This year was the first time I didn't spend Thanksgiving in the midst of my family. I was blessed however to be invited to my good friend (and fellow scrapper) Gwen's home. It was a great day, as we were joined by the Missionaries (from the LDS Church) and it was great to have that type of beautiful spirit on such a special day!

My assignment this Thanksgiving (as it has been in years past within my own family traditions) was to make the place cards. I started with a piece of Stampin Up's Four Seasons Designer paper that was 3" x 3.5". Fold in half and ink all four edges on both sides with Bravo Burgundy stamp pad.

Cut a piece of Morning Marigold Card stock 1.75" x 2.75", ink all four edges with Morning Marigold stamp pad. Adhere to the center of the tent front.

Use the Designer Label Punch Stamp Set, Ink first in Morning Marigold, then using the Rock & Roll technique ink the edges of the stamp in Bravo Burgundy and stamp onto Very Vanilla card stock. Punch out using the Designer Label Punch.

Wrap a piece of wine ribbon around the front half of the card. Adhere punched image over ribbon and you're ready to go!

Easy peasy, right?! I think they turned out nice, and was amused that Elders Marvin and May placing talked about taking them home for their mothers to scrapbook for them! What well trained young men! Too cute! After dinner my own too cute boy slipped the place card into his pocket so the front flap hung outside. Now he was Elder Chenoweth! What a wonderful aspiration for Davy!

Monday, November 20, 2006

101 Things to Do With Ribbon...

Not all of these are my ideas. I've combined different lists from all over. Hope you enjoy! More to come in the next few days!

1. Cut a journaling block into horizontal strips. Tie a ribbon in a bow or knot to the left end of the first strip, then the right end of the second strip, and so on.

2. Create a page frame by stitching ribbon to each side of the page, and then cover the joins with a button or another accent.

3. Collect scraps of ribbon and cover the spiral binding of a journal or album in bows.

4. Tie a bow on a paperclip.

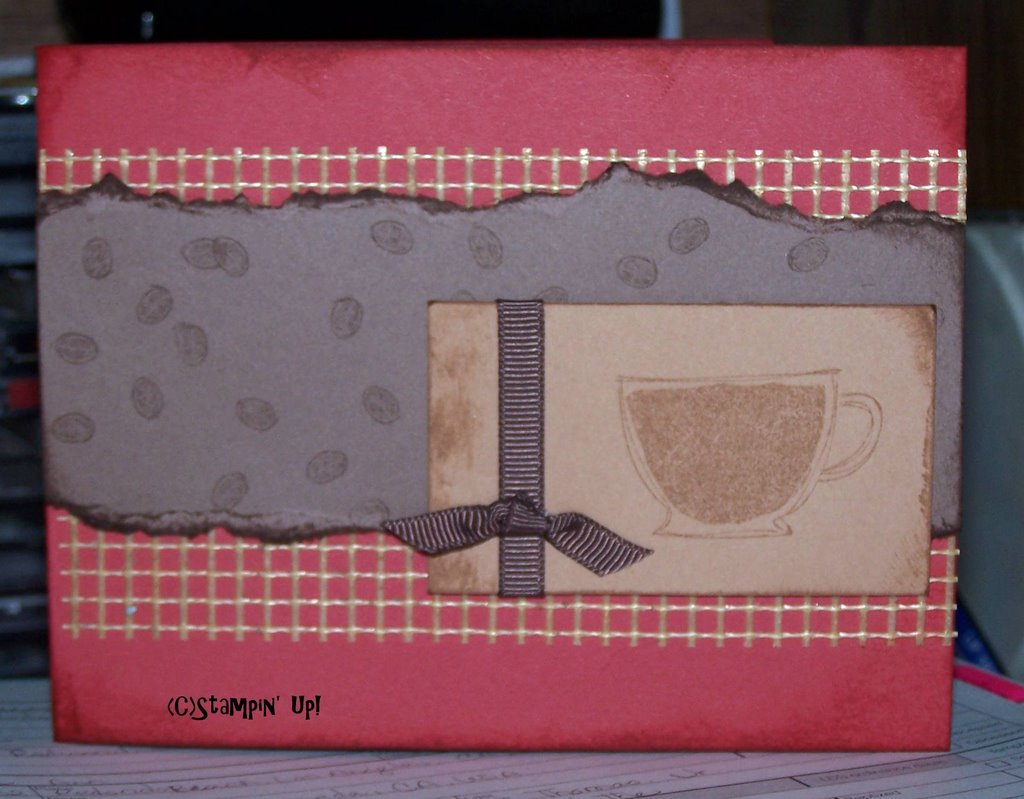
5. Soften the look of metal mesh by knotting satin ribbons through the latticework.

6. Color-block a layout, punch holes where the blocks meet and lace with ribbon.

7. Create a ribbon loop off the side of the page, securing with stitches or staples, to index sections in your album.

8. Stamp tiny tags with a single letter and use narrow ribbons to attach to your page for a quirky title.

9. Hold a bookplate in place by securing each side with a length of ribbon, fixing the ribbons onto the back of your layout.

10. Punch holes along one side of a photo or mat and finish with ribbons tied in loop knots.

11. Loop ribbon around one side of a metal frame, then tie with a tiny knot or bow.

12. Laminate a leaf or another found object, punch a hole and tie on a ribbon.

13. Dye ribbons to match anything perfectly.

14. Crisscross two lengths of ribbon to create a pocket.

15. Turn bows on their side and place at either end of a title.

16. Stamp a name or date on a ribbon, fold around the corner of a photograph and secure with a paperclip.

17. Use ribbon to hang a locket holding something special.

18. Thread two metal rings onto a length of ribbon and secure them both in a loop at one end (you can use an eyelet, nail head, brad, stitches or staples to close the loop). Wrap around a journal, mini book or photo mat and pull the loose end of the ribbon through the rings, just like a belt.

19. Make a masculine tag by threading a plain washer onto a ribbon remnant, folding in half and stapling to the top of a tag.

20. Hide journaling or an additional photograph on your page. Using self-adhesive ribbon as a hinge, secure just one side of a cardstock block to the background.

21. Cover the join between two patterned papers with a length of ribbon.

22. Create a collage between two microscope slides or pieces of transparency, and then tie ribbon around the glass sandwich.

23. Team up ribbon with anything else from the haberdashery section: rickrack, upholstery trim, lace, fibers, snap trim, zips, elastic or a hook and eye set.

24. Layer a brightly colored sheer ribbon over traditional black and white gingham to create custom colored gingham.

25. Stick ribbon over vellum to hide adhesive.

26. Make a flower with loops of ribbon plus a button in the middle.

27. Cover the edge of a border of patterned page with three inch lengths of mismatched ribbons.

28. Use letter stamps on ribbon for journaling or captions.

29. Use rickrack as the stem for a flower accent.

30. Run a thread through a length of ribbon, making loose stitches, and then pull the ribbon together to gather.

31. Apply rub-on letters to a twelve inch strip of ribbon to make a custom border.

32. Cover a scrap of cardstock with ribbon scraps in lines, and then place a cut out shape over the top so the quilted design shows through.

33. Fray ribbon scraps, then overlap and sew to the page.

34. Place a ribbon in a tiny glass charm for a message in a bottle look.

35. Weave your ribbons in big or little sections on your page.

36. Punch holes on one side of a photo mat, then lace the ribbon through and add a charm to one of the loops.

37. Make one long loop of ribbon around an entire page, and then use shorter ribbons to tie knots and bows to that ribbon.

38. Make a bulletin board look by crisscrossing ribbons across the page and joining with brads or buttons.

39. Use frilly ribbons with rustic elements, mixing girly trims with twill tape or a wooden tag.

40. Create your journaling in widely spaced rows. Punch small holes around key words and thread ribbon through to box out or underline words with color.

41. Hang a letter charm from ribbon and wrap around the bottom third of a photo.

42. Use a variety of green ribbons in short, overlapped lengths to represent grass for a summery layout.

43. Place your title and journaling blocks on your layout, then cut slits at the top and bottom. Run sheer ribbon through to hold the blocks in place.

44. Spell a title by threading letter charms onto a longer length of ribbon, adding a knot between each letter.

45. Cut a variety of ribbons to six to eight inch lengths. Adhere at odd angles to the bottom of a double page layout, with the photos and accents above this border.

46. Place short lengths of ribbon over the four corners of a photo and secure in place with brads.

47. Place ribbons around the edge of a large circle shape.

48. Fold ribbon scraps in half and staple to one side of a photo mat.

49. Use a wide ribbon as you would a strip of patterned paper.

50. Stitch your ribbon with a zigzag.

51. Thread silk or paper flowers onto ribbons to create a daisy chain.

52. Use polka-dot ribbon with striped patterned papers.

53. Tie a series of bows or knots to cover a length of wire, and then attach the wire by punch two tiny holes in your page and threading it through to the back.

54. Run a simple border with one thin ribbon across the top of your page and two thin ribbons at the bottom.

55. Tie a group of tags together with brightly colored ribbons.

56. Punch small holes and thread a border like you would lace your shoes.

57. Use sheer green ribbons to represent leaves on flowers.

58. Use your ribbons in vertical strips instead of horizontal.

59. Repeat just one ribbon pattern throughout your layout.

60. Hang tiny jingle bells on a Christmas page.

61. Select two ribbons of contrasting color. Attach one to the left side of the page and the other to the right, then tie together in the middle. Repeat in the opposite colors to make a crisscross if you wish.

62. Get out your eyelets and add to a paper accent, like a monogram letter. Thread ribbon through and tie in a knot.

63. Pin a safety pin through a bow or knot.

64. Tie a ribbon around the stem of any letter in your title.

65. Allow ribbons to come out the top of your {top-loading} page protector.

66. Place one bold strip of a patterned paper on your cardstock background. Add an angled strip of a color-coordinated ribbon. Add an accent near where the two meet, and place the body of your layout in the remaining gap.

67. Punch or cut several small squares or circles. Punch a small hole and tie a ribbon on each, then line up for a border.

68. Line up several lengths of the same ribbon and secure the ends with brads, then place your title on top.

69. Punch a group of holes in any preprinted accent and add ribbons to make it your own.

70. Create a bold frame using short ribbon scraps around all four sides of the page.
71. Have just the ends of flat ribbons appear from one side of a photograph. Stick them directly to the page.

72. Use a series of ribbon-trimmed metal-rimmed tags to journal in list form.

73. Repeatedly wrap a ribbon around a block of cardstock, then tie with a charm, tag or stamped image.

74. Use only black and white ribbons plus one color of cardstock.

75. Stick ribbon directly to the page and cover the ends with square or round accents.

76. Place several twelve inch lengths of ribbon to the page, leaving an inch gap in between. Number the lines of ribbon and add journaling for a # of things I...? layout.

77. Tie ribbons on bobby pins/hair grips and slide onto the edge of a photo.

78. Use ribbon inside a slide frame or book plate.

79. Create a pull tab with a loop of ribbon on a tucked away photo or tag.

80. Use just ginghams!

81. Attach tiny clothes pegs to a length of ribbon.

82. Use white sheer ribbons for angel wings.

83. Thread white letter beads onto ribbons for journaling.

84. Tie ribbons through button holes and tie on the top.

85. Attach pins or badges to a length of ribbon stuck straight to the background.

86. Put your title inside a circle frame, and hold it in place with ribbons on two or more sides. Tuck the ribbons over to the back of the page.

87. Thread on a buckle for a classy accent.

88. Spice up a simple layout with just three knots of ribbon near the corner of a photo.

89. Create a pinwheel design by sticking down bright ribbons cut with an angle at the end.

90. Fold your ribbon in half then cut at an angle to get that little V at the end.

91. Instead of peeling your stickers from the backing, cut them out and treat like regular paper. Punch a hole, tie a ribbon and look at your sticker in a new way.

92. Create a layout with three blocks of cardstock, and then hang multiple ribbons from the bottom of each block.

93. Make a summery layout with mismatched ribbons placed 3/4 of the way down one side, to mimic flags on a sail boat.

94. Make a mini book to hold extra photos and journaling, and make sure the sides wrap around to the front so the covers open to both the left and right. Secure ribbon on the back and tie on the front to close.

95. Thread circles on ribbons to mimic Christmas ornaments, then tuck the ribbons around the top of the page and secure on the back. Design the layout on top of the ornament background.

96. Make it simple: stick a length of ribbon directly to the cardstock. Tie a bow and stick it on top -- an easier way to make everything stay put.

97. Create your title with letters on individual blocks of cardstock, then thread together by punching holes and tying together with ribbons.

98. Use watermark ink to customize your ribbon with a design or phrase.

99. Make curly ribbons by wrapping tightly around a dowel rod or pencil (securing with pins if needed), spraying with corn starch and baking in the oven for about five minutes. Leave to cool and set over night, then remove from the dowel. Great for album covers and bindings.

100. Use ribbon to bind a small book of index prints on your layout, and then add more ribbon to close or hang the book.

101. Grab your favorite ribbon of the moment and work your entire layout around that inspiration. Print your photos in black and white so you don’t have to worry about color clashes and just have fun.

Sunday, November 19, 2006

It's a Christmas Kinda Day

.

Ever have one of those days where you're all dressed up with no where to go? Today (due to truck issues) we missed out on church; and I found myself at odd ends and no idea what to do with myself.

Eventually, after pogo and SCS loss their charm, I wandered back to my play room - I mean my CRAFT room. I actually got a lot done, or I guess I should say that I got a lot started! I began with the On-Board album and the Enchante designer paper (due out in the Winter Mini) and had a blast. It was inspired by a demo during St. Louis Regional, but I added more tricks and things to it. I'm no where near complete on it, but man am I having fun! I'll post it later once it is done
After I put that away, gave the kiddo a bath, and made dinner I once again wandered back to the craft room. This time though we worked on Christmas ornaments. (We being Davy and I, with Thomas along for the company.) Egg Nog and Bing Crosby's Christmas Tunes helped to set the mood.

Here's Davy with his creation - too cute!! He was so excited to be able to contribute to the tree this year, I don't know how I'm going to keep him out of my craft room now! (This time of year my craft room doubles as Santa's workshop!)

David's ornament is flat-ish on two sides. I got a couple boxes of these so after David goes to bed tonight I'll be able to go in and etch the glass. I hope to have blue insides, and snow etched on the outsides. I guess we'll see how it turns out!


I made two ornaments as well. I know you can't tell from the pictures, but the one on the right is the HUGE one and the one on the left is a normal sized bulb. I'm still working on my technique, but here's the instructions:

1. Carefully pull tab out of neck of ornament, set aside.
2. Pour watered down School Glue into the bulb and swirl around to coat entire inside. Pour out excess.
3. Scoop in Pearl Ex powders, glitters and faux snow. Shake around after each scoop.
4. Pour out excess.
5. Carefully re-attach tab to the top of the ornament.
6. Tie color coordinating bow to neck of bulb.

Now... about that mess...

Saturday, November 18, 2006

Baby it's COLD Outside!

Ok, so my workshop the other night went VERY well. We had about 9 people (not including children and husbands) attending, and it was a BLAST! Partly because when you get certain members of this family together they get to picking on each other - what a HOOT!!

Sales weren't astronomical, but that's OK! I had soooo much fun! I was going to include pictures of the things I demo'ed and the Make and Take, BUT they were mostly CASEd from SCS, so I decided not to bother. I did demo the ghosting technique, and it went over nicely! (Though I did have a tad bit of a problem with my tidy tray and STATIC! OUCH!!)

I got one booking only from the workshop, which is a little of a disappointment because my goal is two bookings or more from each workshop. BUT, I did have four more people (one at the workshop, and three today!) sign up for my Christmas 10-10-10; so maybe I'll get some bookings from that?! Keep your fingers crossed!

OK, so other than that, we checked out a "new to us" stamping/paper craft store in Springfield today. All I can say is: YUM-O! Sooooo glad I found them!! They didn't carry any paper, and only a limited amount of cardstock... yeah, I know what you're thinking! The reason is that Springfield has FOUR other scrapbook stores, AND W.Mart, H.Lobby, and Mikes! So the owner says she lets THEM worry about the papers and stickers, and she'll carry the COOL stuff. And man does she ever!

Now I'm off to play with my new stuff. I'll try and get some snap shots to post later.

-Merr

Thursday, November 16, 2006

Workshop Worries

I've started this month with my calendar MOSTLY full... Not all with workshops either! Beyond having fun with Stampin' Up! I also serve as leader for a Girl Scout troop, take care of my grandmother during the day (since I don't have a "real" job!) and serve as Leader for my husband's FRG - that's Family Readiness Group - a military wife thing. (We'll talk about the FRG in the future, I'm SURE!) But that's enough for now... back on topic!

I've started this month with my calendar mostly full (is there an echo in here?) which is nice, keep me busy and all that, but I've been VERY worried about having two workshops back to back. Luckily (and I must be a terrible demo for saying this!) my Wednesday workshop was cancled, and all that prep work that I put in on Monday and Tuesday has saved me Wednesday and Thursday's work for the workshop on Friday! So lets hear it for Wednesday's Hostess who is currently my hero for being too over worked to keep her workshop! (Hip hip hooray!!)

LOL!!

So I thought I'd share my projects that I've prepared for Wednesday's - now Friday's - workshop!!

First we have the hostess gift. It's safe to post it here before the workshop because hey, I've just started the blog tonight and no one knows about it yet!

I got the instructions for the mini purse at the St. Louis Regionals last weekend (WOW talk about fun!!) and adore how easy it is to make. If you need the template, drop me an email and I'll help you out! Also included in this gift is a covered 3x5 scratch pad (purchased at Staples) and a Micro-beaded RSVP Pen.

Wanted to stop here and talk about the pen real quick. I've used the Four Seasons Double Sided Designer Papers from Stampin' Up! which has snowflakes on one side, and blue stripes on the other. For the pen I had the snowflakes showing, and once covered with the clear micro beads they appear frosted! Talk about cool.

COLD! (snicker!)

FROSTY even! (lol, I couldn't help myself!)

All three items were made with a single sheet of 12 x 12 paper and a bit of ribbon. Cost effective and MAN do I hate to give them away!


Also on the agenda for this workshop is a couple door prizes. I made them all the same so I'm only going to post one of them. Keeping with the snowy theme for the night. In a cello bag I've thinly sliced scraps of the Four Seasons Designer Paper and then run it through my crimper (again St. Louis Regionals ROCKED!) then added a stampin' spot (because I have three in this color!) along with an incentive stamp! How cool is it that the door prizes are going to match the hostess gift, which actually match the projects I'll be presenting too! Man am I on a roll or what?!

Yeah, I know the bag topper is a little - dare I say it - boring! I'm planning on going back in with my Festive Favorites stamp set and adding a few of the frosty guys to the topper before the workshop tomorrow. BUT that's only if I can find time!

I'll post the actual demo cards and Make & Take tomorrow... Along with info about how my workshop went. For now though I've gotta get to bed! It's already late and 6:30 comes quick!

-Merr

Ready Set GO!

I've hemmed and hawed about starting a blog. Partly I've been reluctant to admit that I had no idea what in the world a blog is... or the PURPOSE of a blog. So be it. I'm no longer techno-savvy! Dare I say it - I've started to get old.

I'm turning into my grandmother! (GASP!) Or worse... My husband (Whom I love dearly, but sorry to say, my DH can't chicken peck his way around a keyboard to save his life... It's actually painful to watch!)

So in defiance against my up coming birthday and my FIRST GRAY HAIR I've decided to take the plunge and try to muddle my way through the whole blog thing. So here we are, and hey, guess what? I kinda get it now!

Anyway, how about we get on with the show...?