Showing posts with label Paper Craft. Show all posts

Monday, February 2, 2009

Third of Three

Well friends, I'm completely pooped! I went on my first run (training for the marathon, 
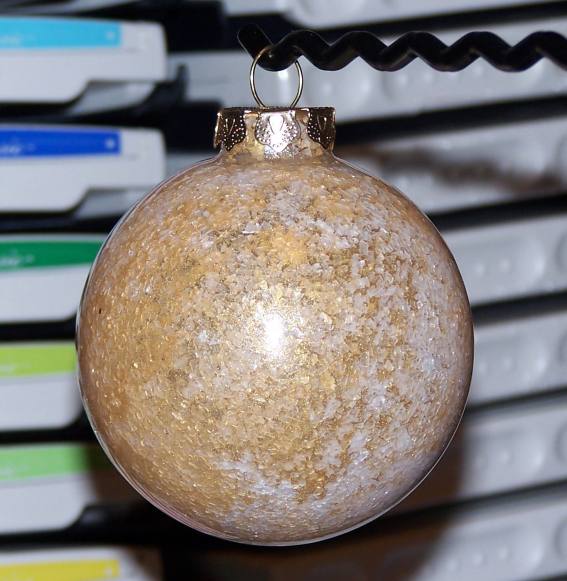
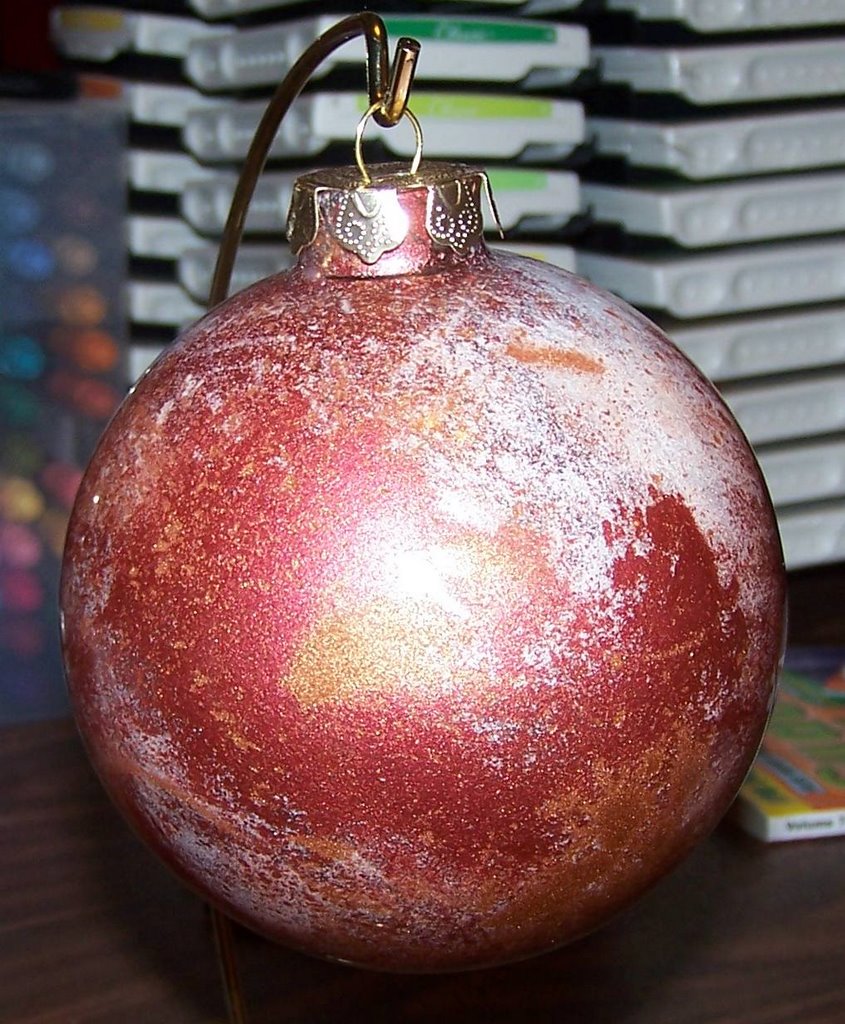
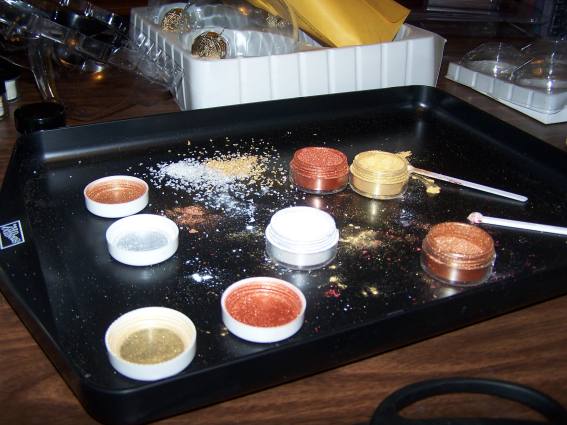
remember? Click on my button and help me get to Seattle!) tonight. OK, I walked a little ways, but I did my best to keep moving, and that's what it's all about, right? First thing on my docket for tomorrow (after physical therapy for my shoulder of course) is to get myself some proper running shoes. My nearly seven year old Nike's aren't going to cut it I'm afraid!


Enough of that though, I think we all know the REAL reason I'm posting tonight... Yep, installment number three of three in the Simply Lovin kit. I did plenty of work on the papers and all, but the embellishments is where I really went a tad crazy I think.
Hope you enjoy it. Right now though I've got to get a shower and hit the hay. Busy day of shopping tomorrow!

Saturday, December 15, 2007

A Tisket a Tasket....

... A Christmas colored basket.


All the Christmas cards are done, the house is decorated, and the cookies are made. Christmas time at the Chenoweth household is running like clockwork!
To celebrate this momentous occasion I spent the afternoon in my craft room coming up with a new tutorial! And guess what! I want to share it with you!


Isn't he cute?! lol
Supplies:
  • Paper
  • Adhesive
  • Glue Dots
  • Brads
  • Anywhere Hole Punch

Instructions:

  1. Make reeds: Cut 11 strips of paper to 1” x 11”; fold in half length wise (hot dog fold) at ½”; run a line of glue down the middle to adhere sides together
  2. Lay four of the reeds side by side on a flat surface and weave in four more. Slide the strips together to make the bottom of the basket.
  3. Fold the ends of the reeds up to form the side spokes.
  4. Attach a brad to the end of a reed to the first basket spoke. This will hold the end in place as you weave that read through the remaining basket spokes. Attach end of reed to the brad after making it around the basket.
  5. Weave in the remaining reeds as described above.
  6. Fold the tops of the spokes into the basket and tuck them behind a reed or for a sturdier basket, adhere them in place.
  7. Decorate as desired.

To download a PDF file of this tutorial click here. If you have problems downloading this information or would like to share your creations, please email me!

Monday, November 19, 2007

Back at it Again


I just can't seem to stay away from making Fall/Thanksgiving themed items! As you know, Thanksgiving is only a few short days away and I've still got a list of things to make. This little number is part of my holiday centerpiece and was inspired by a similar project shared by Karen Gibson.

So far I've made just this one, but plan on making another. I would like to have made three, but have run out of jars. I'm also thinking about how to make this same project with Christmas paper and stamps, wouldn't that be cute?! Anyway, here is my supply list!
  • Outlaw DSP
  • Creamy Caramel CS
  • Really Rust CS
  • Close to Cocoa CS
  • Close to Cocoa Ink
  • Glue dots
  • Rhinestone brads
  • Paper crimper
  • Votive Candle
  • Small Mason Jar

Now I'm off to stamp up a table cloth! Wish me luck!

Friday, November 9, 2007

Glass Charms


As promised - here is a sample of the glass charms I made for my Thanksgiving table. This one is actually Davy's. I made one with a flower for myself and one with leaves & an acorn for my husband.


After stamping and shrinking the plastic I covered them with micro beads so they will glimmer in the candle light!

To attach these to the glass you can put a jump ring through the punched hole and string it on a ribbon. Last year I used gold cord, this year I used our tan gingham ribbon.


If you need instructions, email me and I'll be happy to help you out.

Wednesday, November 7, 2007

Thanks!


Continuing on with the Giving Thanks theme I seem to be stuck on this month, I'd like to show you what I worked on yesterday evening and finally finished this morning. I can hardly wait for Thanksgiving now, with all my cute decorations!

For this project I used:
  • Simon Lower Chipboard
  • Fall Flowers Designer Paper
  • Always Artichoke Grosgrain Ribbon
  • Crop-A-Dile
I used Stampin' Up!'s Anywhere Glue Stick to adhere the paper on to the chip board, and cut away the excess with my craft knife. After sanding the edges I punched two holes at the top of each letter with my Crop-A-Dile and then thread the ribbon through.


In the past I've tried different glues and adhesives for attaching paper to chipboard and have found that I really like using Stampin' Up!'s Anywhere glue stick for these projects. Unlike other glues (like YES! Paste or decoupage medium) the Anywhere glue stick dries quickly. If you've not used it lately (or ever), I suggest you try it, it's inexpensive, holds well and these glue sticks last a long time!

Tomorrow I'll be working on stemware charms and maybe even some place cards or napkin rings for the table. I guess you'll just have to check back and see what I come up with, won't ya?

Tuesday, November 6, 2007

Tumbled Marble Trivets

Ahhh... My husband is off to work, Davy is off to school, and I'm toasty warm in my bathrobe and socks. Even the dogs are cooperating by taking a peaceful snooze behind me. The only thing this morning needs now is a new post on my blog followed by some stamping time in my craft room!
As promised, here are some of the trivets I made yesterday. It is so super simple I thought I'd go ahead and walk you through it one time just for the fun of it.
Supplies:
  • Tumbled marble tiles - available at your local home improvement store
  • Craft ink pads - various colors
  • Stamp set of choice - I used Bud Basics
  • Oven - preheat to 250 degrees
  • Small felt pads - also available at your local home improvement store
Instructions:
  1. WASH your tiles and allow to dry completely. I did this the night before so I would be SURE they were dry and ready to go.
  2. Stamp your images using Stampin' Up!'s craft ink pads.
  3. Pop in the oven for about half an hour or until it looks like the ink is completely dry. This will heat set the ink so it should not fade or run.

See? How easy is that? These two trivets will grace my Thanksgiving and Christmas table, but I'm thinking about making another set for my mother and sister.

Same supplies and instructions apply if you are making coasters from the smaller tiles. I'd love to see what you make. Email them to me and I will post them here for everyone to see and enjoy!

Monday, November 5, 2007

Getting Ready for Giving Thanks


I am so excited about Stampin' Up!'s Paper Party Promotion. I've gotten four sets of designer series paper for the price of three! One of the sets I got was the Fall Flowers papers, and they are too cute for words. It is SO easy to make great gifts with Stampin' Up!'s Designer Seriese paper that it is almost a no brainer!


Today I'll share the gift set I've made for Davy's teacher Mrs. Lea. I've put together a paper purse, note pad and decorated pen. I'm thinking about adding in a little bit of candy or something like that, maybe I'll get to that tonight after dinner.


For this gift set I used: Fall Flowers Designer Series Paper, Always Artichoke grosgrain ribbon, Natural Hemp Twine, Really Rust eyelets, Old Olive card stock and marker, Sahara Sand Card stock, Really Rust card stock and marker, Shrink Plastic (non-SU! product), Scallop punch, large and small tag punches, and a metal edged tag (retired). I used the Pick a Petal and Tagger's Dozen stamp sets.


Tonight I'm finishing up work on the trivets I'll be using on our table this Thanksgiving. There are some finishing touches to be done there, but I will be sure to share just as soon as they're ready to be photographed. Until then, happy stamping and don't forget to call me with your Paper Party order!

Sunday, October 7, 2007

New Covenant Crop

Yay! After a ton of hard work the New Covenant Crop has come and gone! I had so much fun. The other vendors were great - as always - and the croppers were wonderful! Friday night I set up my booth and put inspiration sheets in the gift bags for all the croppers. Saturday started early and gave us a few moments for a few last minute things.

I was placed next to Rosalinda with TLC and she was such a hoot. There were of course old friends there as well. Miss Rachel was there with Party Lite candles, and the Scrapbooking Mommiez were there as well as DeDe Vest with Creative Memories. I was so excited to be there with these wonderful women that I was nearly bouncing off the walls.

While at the crop I offered a Basic Stamping class. It was so much fun to see these women learning these new techniques. I love the look of discovery on their faces - and the giggles when they did something well! This is truly my FAVORITE part of being a Stampin' Up! demonstrator - helping people to find unknown areas of creativity within them selves! For this class we completed a "cheat sheet" pamphlet with nine basic stamping techniques and then made a post it note cover and a card utilizing these new techniques! Congratulations ladies on a job well done!

In addition to this class I offered free Make and Takes through out the day. I presented a clear card and it really was a big hit. It was easy to assemble and was popular enough that I had to open two more make and take sessions in order to accommodate all those who wanted to make it. Happily I remembered from the last Mega Crop and brought with me extra card stock and supplies so I could cut extra if I ran out of anything! Yay!

On top of all that I took along all my retired stamp sets. I sold all but 10 sets - about which Tim is thrilled about because now they can be stored in my craft room rather than the garage!

Oh boy, I'm pooped now though. Thank goodness I don't have anything to do today - it will give me time to recover from yesterday! I hope that if you didn't come this time that you will attend at the next crop in March! It was a wonderful experience and I would really hate for you to miss out! If you WERE there and came in to read my blog THANKS!!! I had so much fun with you ladies and I hope to see you again next time!! Don't be a stranger though - email me!!

Monday, October 1, 2007

You Call This Work?

Oh boy! I've been a busy little bee this weekend! It occurred to me on Friday that OMG! I only have THIS week to finish getting ready for the NCA Mega Crop! So I checked my to do list and added like twenty things and then turned on the TV - plenty of time - RIGHT?! Yeah.... SURE... Right...

So finally about six last night I get off my duff and get to work. I stamped my contact info on Inspiration Sheets and Mini Catalogs. I printed and folded Technique Pamphlets for my class. I removed all the retired cards from my display board. And then finally, once my husband and sweet boy were in bed I got down to work.

I made this Frap Bottle set and had a wonderful time making it! I was SO excited about how it turned out. The bottles are filled with hand made bath salts made by yours truly. I'll give the recipe below in case you'd like to make your own!

For this project I used River Rock, Blush Blossom, and Very Vanilla Card stock; Blush Blossom, River Rock and Pretty in Pink Classic Ink pads; Pink Organdy (I just LOVE this ribbon!), and Pink Grosgrain Ribbons; Polka Dots and Paisley Stamp Set; See You Around, and Petals Wheels, Large Oval, Scalloped, and 1-1/4" Circle Punches; and Signo White Gel Pen.

Milk Bath Recipe
Ingredients:
  • 2 C Dry Milk
  • 1 C Epsom Salt
  • 1/2 C Baking Soda
  • 1/2 C Dead Sea Salt
  • 1/4 C Citric Acid
Directions:
  1. Combine all ingredients in a large bowl and mix well.
  2. Cover tightly to retain integrity of ingredients!
Could that be simpler?! Oh, and to use this stuff is SO nice! If you're inclined you can add extra special ingredients like chammomile flowers or even some Essential Oils. If you're not used to using these though, I hope you'll find a reputable website to learn how to use them.
For Chocolate Milk Bath the directions and ingredients are the same as above, except you need to add 1/4 C Cocoa Powder. Couldn't be easier right?!
Yummy - but don't drink either of these please! It will give you the trots and really they wouldn't taste good at all!!

Alright now, time to get back to the craft room and get some more stamping done! I can't wait till Saturday! I hope to see you there! Remember to come by my booth to sign up for my door prizes - a free catalog PLUS a gift certificate!!

Sunday, September 30, 2007

Envy Flower

You just never know where you'll get inspiration! I was watching Trading Spaces this morning and one of the designers was working on a little girl's room. This particular team made some really cool flowers to hang from the ceiling and the following tutorial is my take on her idea.


Supplies

  • 5 #10 Envelopes
  • Jumbo Wheel of Choice
  • Jumbo Wheel Handle
  • Stampin’ Up! Ink Pad (or cartridge)
  • Dotto Adhesive
  • Oval Punch
  • Paper Trimmer
  • Craft and Rubber Scissors


Instructions


  1. Seal all envelopes.
  2. Wheel both sides of all envelopes
  3. Cut all envelopes in half – at the 4¾ inch mark.
  4. Punch the two corners on the OPEN edge of the envelope using the Oval Punch
  5. Trim off excess of corner with paper snips.
  6. Run adhesive down the middle and across the bottom of each envelope, stacking one on top of another until all are adhered in a pile.
  7. Run adhesive on the top envelope just as you did the previous nine.
  8. Attach the top envelope to the bottom envelope to make a complete flower.

I would absolutely LOVE to see any examples you make with this! Email me at stampinmerr@email.com!!

Wednesday, August 8, 2007

Daisy Crazy

That time of year has nearly arrived! Children dread it, parents wish for it. Yes, I'm talking about BACK TO SCHOOL! Or, as in the Chenoweth household, time to go to school for the first time!! That's right, our Davy, sweet, innocent and docile creature that he is will be wreaking havoc on someone else for most of the day soon!

Jump back a week in time however and picture me with my child (who is never messy and always does exactly what his mama asks him to) in Staples. We're buying school supplies and Mama's desk supplies, cause after all I do have a business to run too! We're tossing stuff in the cart right and left and the magic item tossed in happens to be a combo-pack of printer ink.

For purchasing that combo-pack we received a $10 gift certificate for Staples. My first thought was "Duh, of course I get one of those AFTER I buy school supplies." That little nasty was followed by: "But maybe I can give this to David's soon to be VICTIM - I mean teacher!" (You know, kind of butter her up and get in her good graces before David shows his inner demon!)

So, tonight has been spent trying to dress up that ugly gift card into something I can give to Mr. School Boy to hand over to his poor poor poor unsuspecting teacher on open house two days before school starts.

I used Purely Pomegranate and Bashful Blue card stock, the Build-A-Flower Accents and Elements, the Much Appreciated stamp set, as well as my Stardust Pen (non-Stampin' Up!) I went a little crazy with the flowers, but I was enjoying myself and so that's OK with me. I wasn't sure I'd ever make a project I liked with these flowers and it turned out to be more fun than I imagined it would be! So anyway, that's the front of the card. The inside isn't decorated so I won't bore you with any more on the card.

To accompany the card - and hide the UGLY Staples gift card - I used the Accents and Elements tin. First I punched holes at the top with my Crop-a-Dile and threaded some of the Double Stitched Purely Pomegranate ribbon through to make a little handle. I then punched three holes across the top to insert some of our Circle Rhinestone Brads, I used cool colors for this project. Then I put on some of the self adhesive die cut flowers from the tin on the top, a lot fewer this time though! Time to move on to the chipboard now. I took the "L" letter from our On Board series and covered it with Purely Pomegranate ink. Because I think the "L" looked more like a "1" I cut it up a little to look more like an "L" and punched three little holes down the top with the Crop-a-Dile. Time to go a little crazy with the stardust pen again and viola! All done!

I'm actually thinking about going back in and adding more flowers to the tin... I'm thinking it needs something and it may just have to be more more more more more flowers!! LOL!

Someone, quick!! Stop me!!!!!!

Friday, July 20, 2007

Missouri Sales Tax Holiday!

Good news! Several states' legislatures have passed a special sales tax holiday during specific dates in August. During this period, sales tax does not apply to school supplies. The participating states typically define school supplies as any item normally used by students in a standard classroom for educational purposes.

Missouri: August 3-5

By placing your orders during these dates, you can take advantage of this tax holiday and make purchases without sales tax. What a wonderful opportunity to save some money on stamping and paper crafting supplies!

Based on state statutes, we've identified the items that will be exempt from sales tax in these states during the period. Stampin' Up! will not charge sales tax for these items ordered during this sales tax holiday.

Adhesives

  • 2-Way Glue Pen
  • Liquid Glue
  • SNAIL Adhesive
  • SNAIL Refill
  • Dotto
  • Dotto refill
  • Anywhere Glue Stick
  • Sticky Strip
  • Stampin' Dimensionals
  • Mini Glue Dots
  • Pop-Up Glue Dots
  • Greeting Glue

Scissors

  • Paper Snips
  • Craft & Rubber Scissors
  • Craft & Paper Scissors

Brushes

  • Stipple Brushes
  • Flat brush
  • Medium brush
  • Small brush

Pens and Pencils

  • Metallic Art pencils
  • Pure color pencils
  • Watercolor pencils
  • Pencil sharpener
  • Uni-ball Signo Gel Pen
  • ZIG PaintyBlender pen

Water Color Wonder Crayons

  • Bold Brights
  • Earth Elements
  • Rich Regals
  • Soft Subtles
  • Neutrals

Markers and Jorunalers

  • Stampin' Kids markers
  • Stampin' Write markers - You can purchase these individually, but not as the set.
  • Basic Black Stampin' Write journaler
  • Basic Brown Stampin' Write journaler

Call or email me today to place your order and I will hold that order until the tax holiday!

Thursday, June 21, 2007

Miss Me?

I know some of you have missed me because you've been calling and harping on me about updating my blog! To those who don't know me well enough to have my cell number I hope you'll still read this darn thing even though it's been AGES since I've posted! I am glad to be back though, and looking forward to posting new cards!

As for my absence, there's been a TON going on at home. Tim (my DH) came home for two weeks from Iraq. While his visit was short it was wonderful to see him, and we had an absolute blast! It was nice to be able to spend some time with him and renew our marriage a little bit. While he was home we went to Eureka Springs, Arkansas and stayed at the Crescent Hotel. If you ever get a chance to go that way I suggest you stop in and stay the night. It was an amazing adventure to say the least!!

On the coattails of the good news about Tim's visit there was some scary news in our family. My daddy was diagnosed with cancer during my time away from you. I'm sure a lot of women feel that their daddy is the best, but I KNOW mine is. He's over come a lot in his lifetime and it seems so unfair that now he has to face this as well. I am a daddy's girl and this is particularly hard for me - in fact I think he's taking the news better than I am! He has already had the tumor removed, but has to have 14 teeth pulled and a feeding tube inserted before he can start radiation and chemo. Please, if you read this, join my family and I in prayer for Dad's health and well being.

In addition to all that I've been an assistant seamstress for a renaissance guild preparing for their first joust of the summer! It's been an interesting adventure, and so nice to meet new people with a decidedly different view point on a lot of things! I've enjoyed my time with them and am REALLY looking forward to the White Heart Renaissance Faire coming up the next three weekends!

And, as if all that wasn't enough, I've managed to have a few uncomfortable health issues as well. First I managed (who knows how) to pull some of the muscles in my ribcage. Each breath was a struggle and THANKFULLY I recovered quickly. The same can't be said for my next more mysterious illness - a systemic reaction to a bug bite. Yup. Hives and rashes all over my body. I've been itching for just over three weeks, but am making progress since the swelling in my face has gone away and the rash is now located to places not seen by the general public.

So enough about me. How about a card? I did manage to get ONE done while I was away, as well as a pretty little something else too! LOL. What do I call it though? Lets start with the card first though, OK?

I used a new Hostess Stamp Set called All About Occasions that will be coming out July 2007 from Stampin' Up! As a demonstrator I was able to preorder this set (along with a few others!), and I'm SO happy! It is such a cute set, and easy peasy to work with. It comes with two Jumbo Wheels and a four-piece stamp set. So I used black, white, tempting turquoise, and real red card stock, our large tag punch, and ticket corner punch, tempting turquoise and summer sun markers, and turquoise ribbon.

On my LOVE paper craft I used another new Hostess Stamp Set, this one is called In the Spot Light and is SO fun to play with! I can't wait to start demo-ing with this set! Anyway, I covered four coasters with Chocolate Chip cardstock. I stamped the images tone on tone on the Cameo Coral cardstock and then doodled with my Galaxy marker. I punched chocolate chip scalloped ovals out, detailed them with the Galaxy marker again and then added the letters in Apricot Appeal cut out on my Cricut machine. I punched holes in with the Cropodile and tied the pieces together with our white organdy ribbon. So cute, so easy and I think I'll give it to my mother.

Anyway friends, it's getting late and I've got to get back to work on stuff for my retirement party coming up on Monday. If you're in the Springfield, Missouri area and want to come, please join us! Email me for more info!!

Friday, January 19, 2007

Man oh man did I get a ton of emails and posts since yesterday and all of them wanting the same thing… Instructions for the card below! Wow! Glad glad glad that everyone likes it! I was sure impressed with myself when I completed it! (And even as amazing as it looks on the computer it’s 110% better in real life! So anyway, here’s my tutorial on how to make this card!


Polished Stone
Materials:


  • 3 different Alcohol inks (I used Terra Cotta, Wild Plum and Currant)

  • Krylon Copper Leafing Pen

  • Glossy Cardstock

  • Felt Dauber (called a “stomper” locally)

  • Alcohol Ink Blending Solution


Instructions:

  • Randomly dot glossy cardstock with Copper Leafing Pen

  • Apply three or four drops of each color to felt dauber, and add some blending solution

  • Smoosh all over paper being sure to cover all the white spots. It’s OK if the Copper Leafing mixes in a little.

  • Once the cardstock is completely covered hold bottle of blending solution above the cardstock and allow to drip. This will scatter the ink and pen, leaving a marbleize effect.

  • The higher you hold the bottle when you drip it the larger the splots are going to be.


This same thing can be accomplished using Stampin’ Up! supplies. Rather than alcohol inks, use reinkers, and substitute rubbing alcohol for blending solution! You’ve got it made!

Have fun, and feel free to email me if you have any questions!

Wednesday, January 3, 2007

Home Again, Home Again...


I hope you've missed me this week as much as I've missed you. I also hope that you've had the best ever holiday season! I went to Ohio for the week, and MAN am I glad to be home with my stamping stuff again! I went to spend time with my 81 year old grandmother and was concerend taht I wasn't going to have the time/inclination to stamp while I was there. Man was I wrong! So lesson learned. Next time the stamping stuff goes with me, even if it means taking an additional bag!

Anyway, just before I left I finished up my ATC's for Vanessa's swap. I set out trying to come up with something WOW, and different. But I guess I ended up shy of wow, and not so different. I did try the ghosting technique, which was fun. And I finally used my Blue Frost Kalidescope pad, which is cool. So all is not lost. I did look at the list of participants though, and MAN am I in for a treat when this stuff comes back! There are some TALENTED ladies on that list. *sigh* I will endevor to be better for the next swap!

We did have a great time in Ohio though I worried about my ATC's the entire time. We got to see my Uncle Clyde and Aunt Sue, my Great Aunt Sissy and her children Frank and Beth. We stayed with my Uncle Willie at his cute little house in Columbus! I also got to see my cousin Lara. (She's the cutie on the right!) Along with her friend Molly, who David just adored! This pic was taken our last day there. Lara, Molly and I took Dave to the park at the end of the street. I swear those girls had as much - if not more - fun on the jungle gym and swings as David! I occupied my time taking over 60 pictures. This is my favorite one though. Arne't they cute?!

So anyway, time to get dressed and put the war paint on! I've got to get some errans run. Rest assured though that I'll post again soon. (As soon as I make something!)

- Merr

Friday, November 24, 2006

Happy Thanksgiving!

Hope everyone had a fantastic Thanksgiving! I know mine was wonderful, though completely different that the 25 past years! This year was the first time I didn't spend Thanksgiving in the midst of my family. I was blessed however to be invited to my good friend (and fellow scrapper) Gwen's home. It was a great day, as we were joined by the Missionaries (from the LDS Church) and it was great to have that type of beautiful spirit on such a special day!

My assignment this Thanksgiving (as it has been in years past within my own family traditions) was to make the place cards. I started with a piece of Stampin Up's Four Seasons Designer paper that was 3" x 3.5". Fold in half and ink all four edges on both sides with Bravo Burgundy stamp pad.

Cut a piece of Morning Marigold Card stock 1.75" x 2.75", ink all four edges with Morning Marigold stamp pad. Adhere to the center of the tent front.

Use the Designer Label Punch Stamp Set, Ink first in Morning Marigold, then using the Rock & Roll technique ink the edges of the stamp in Bravo Burgundy and stamp onto Very Vanilla card stock. Punch out using the Designer Label Punch.

Wrap a piece of wine ribbon around the front half of the card. Adhere punched image over ribbon and you're ready to go!

Easy peasy, right?! I think they turned out nice, and was amused that Elders Marvin and May placing talked about taking them home for their mothers to scrapbook for them! What well trained young men! Too cute! After dinner my own too cute boy slipped the place card into his pocket so the front flap hung outside. Now he was Elder Chenoweth! What a wonderful aspiration for Davy!

Sunday, November 19, 2006

It's a Christmas Kinda Day

.

Ever have one of those days where you're all dressed up with no where to go? Today (due to truck issues) we missed out on church; and I found myself at odd ends and no idea what to do with myself.

Eventually, after pogo and SCS loss their charm, I wandered back to my play room - I mean my CRAFT room. I actually got a lot done, or I guess I should say that I got a lot started! I began with the On-Board album and the Enchante designer paper (due out in the Winter Mini) and had a blast. It was inspired by a demo during St. Louis Regional, but I added more tricks and things to it. I'm no where near complete on it, but man am I having fun! I'll post it later once it is done
After I put that away, gave the kiddo a bath, and made dinner I once again wandered back to the craft room. This time though we worked on Christmas ornaments. (We being Davy and I, with Thomas along for the company.) Egg Nog and Bing Crosby's Christmas Tunes helped to set the mood.

Here's Davy with his creation - too cute!! He was so excited to be able to contribute to the tree this year, I don't know how I'm going to keep him out of my craft room now! (This time of year my craft room doubles as Santa's workshop!)

David's ornament is flat-ish on two sides. I got a couple boxes of these so after David goes to bed tonight I'll be able to go in and etch the glass. I hope to have blue insides, and snow etched on the outsides. I guess we'll see how it turns out!


I made two ornaments as well. I know you can't tell from the pictures, but the one on the right is the HUGE one and the one on the left is a normal sized bulb. I'm still working on my technique, but here's the instructions:

1. Carefully pull tab out of neck of ornament, set aside.
2. Pour watered down School Glue into the bulb and swirl around to coat entire inside. Pour out excess.
3. Scoop in Pearl Ex powders, glitters and faux snow. Shake around after each scoop.
4. Pour out excess.
5. Carefully re-attach tab to the top of the ornament.
6. Tie color coordinating bow to neck of bulb.

Now... about that mess...

Thursday, November 16, 2006

Workshop Worries

I've started this month with my calendar MOSTLY full... Not all with workshops either! Beyond having fun with Stampin' Up! I also serve as leader for a Girl Scout troop, take care of my grandmother during the day (since I don't have a "real" job!) and serve as Leader for my husband's FRG - that's Family Readiness Group - a military wife thing. (We'll talk about the FRG in the future, I'm SURE!) But that's enough for now... back on topic!

I've started this month with my calendar mostly full (is there an echo in here?) which is nice, keep me busy and all that, but I've been VERY worried about having two workshops back to back. Luckily (and I must be a terrible demo for saying this!) my Wednesday workshop was cancled, and all that prep work that I put in on Monday and Tuesday has saved me Wednesday and Thursday's work for the workshop on Friday! So lets hear it for Wednesday's Hostess who is currently my hero for being too over worked to keep her workshop! (Hip hip hooray!!)

LOL!!

So I thought I'd share my projects that I've prepared for Wednesday's - now Friday's - workshop!!

First we have the hostess gift. It's safe to post it here before the workshop because hey, I've just started the blog tonight and no one knows about it yet!

I got the instructions for the mini purse at the St. Louis Regionals last weekend (WOW talk about fun!!) and adore how easy it is to make. If you need the template, drop me an email and I'll help you out! Also included in this gift is a covered 3x5 scratch pad (purchased at Staples) and a Micro-beaded RSVP Pen.

Wanted to stop here and talk about the pen real quick. I've used the Four Seasons Double Sided Designer Papers from Stampin' Up! which has snowflakes on one side, and blue stripes on the other. For the pen I had the snowflakes showing, and once covered with the clear micro beads they appear frosted! Talk about cool.

COLD! (snicker!)

FROSTY even! (lol, I couldn't help myself!)

All three items were made with a single sheet of 12 x 12 paper and a bit of ribbon. Cost effective and MAN do I hate to give them away!


Also on the agenda for this workshop is a couple door prizes. I made them all the same so I'm only going to post one of them. Keeping with the snowy theme for the night. In a cello bag I've thinly sliced scraps of the Four Seasons Designer Paper and then run it through my crimper (again St. Louis Regionals ROCKED!) then added a stampin' spot (because I have three in this color!) along with an incentive stamp! How cool is it that the door prizes are going to match the hostess gift, which actually match the projects I'll be presenting too! Man am I on a roll or what?!

Yeah, I know the bag topper is a little - dare I say it - boring! I'm planning on going back in with my Festive Favorites stamp set and adding a few of the frosty guys to the topper before the workshop tomorrow. BUT that's only if I can find time!

I'll post the actual demo cards and Make & Take tomorrow... Along with info about how my workshop went. For now though I've gotta get to bed! It's already late and 6:30 comes quick!

-Merr